Welcome to my projects site. This site just moved to a new home.
Fuel System Restoration for 1918 IHC Model M
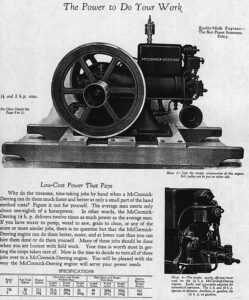
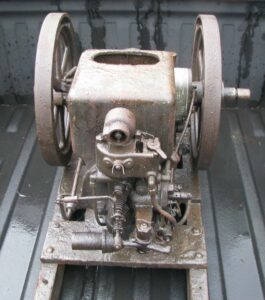 I bought a nice barn-fresh 1918 McCormick 1-1/2HP Model M engine from John Rozevink and picked up at Coolspring in the fall of 2009. The engine was on the original skid with plenty of original paint, at least what you could see of it under a thick layer of oily, dusty crud. I had been taking it to shows after cleaning it up and getting it started, but never got around to fixing the gas tank. I just poured gas into the mixer bowl and let it run until it was out of gas – so maybe 10 minutes at a whack. It was fun, but I needed to get it all back together. So I finally did. Click here to read the whole story…
Upgraded Cart for 1-1/2HP McCormick Model M
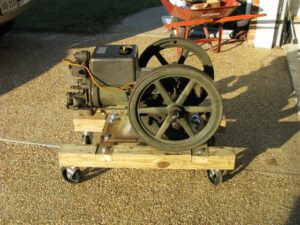
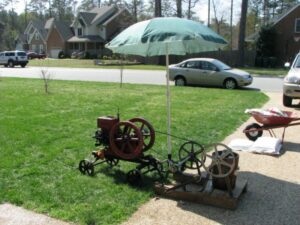
I recently completed an upgrade to the cart I have under one of my 1-1/2HP Model M engine. This was a long time coming, as I desperately needed to get rid of the caster system I was using.
I had thought about making a proper replica cart, but since I didn’t spring for the repro Model M bolsters and I didn’t have the right wheels anyway, decided on re-using the same wooden frame I had originally built using leftover bits of 4 x 4 from other projects. It was a solid frame and just needed better wheels. The plan was to remove the old casters, bolt on some planks for the new bolsters and then put everything together. Read the full story here:
Private Pilot Checkride – Complete!
Well, I finally completed my FAA check ride for my pilot’s certificate. I am now licensed as a private pilot of single engine – land airplanes (as opposed to seaplanes), with all my time in a Cessna 172. I began the training process back in November, right after Thanksgiving. I had always wanted to fly, but never quite believed I would have the time, money or later-life inclination to do it. That all changed when my neighbor took me flying with him a few times, and my wife suggested I take flying lessons.
It was a lot of fun. I enjoyed my training immensely, even when I reached a plateau fairly early on in learning how to land properly and gently. I eventually crossed the plateau as described in my previous post here, and went on to finish my training with some quite enjoyable activities, including flying into a controlled airport and six cross country flights, three of them solo.
I did my three required solo landings at a controlled airport at Newport News (PHF) in April, shortly after my solo. We spent a day there with me under instruction, and Kacper introduced short field takeoffs and landings and soft field takeoffs and landings too. Then we went back the following week and did a few practice landings before Kacper got out of the plane and let me do my solo landings. It was somewhat anticlimactic.
The first cross country flight was soon after that, cruising down to Halifax, NC (IXA). My chart was marked up and I picked good checkpoints I knew I could identify. I used Google Earth to “fly” the route to assist in identifying the landmarks and it helped. We landed in Halifax with no difficulty and taxied around for an immediate takeoff and return. On the way back to PVG, we practiced a diversion and landed at Suffolk (SFQ) for lunch. The restaurant was newly reopened, and we had some delicious burgers. Then back to PVG without further incident.
The next flight was scheduled to complete all the night training requirements (3 hours). We started at PVG and did some stop and go landings and then began the night cross country trip, again to IXA. It was nice seeing all the lights from 4500 feet, and it made finding landmarks easy, as I had picked towns to look at. We did a few touch and go landings at IXA before returning, again stopping at Suffolk to do some more landings. I did 16 landings that night with at least 13 of them full stop landings. We ended the trip just before midnight.
Then I got to do my first solo cross country to IXA. It was a very nice, clear day and I finished the trip in 2 hours, which included 4 full stop landings at IXA before returning to PVG. I filed and activated a flight plan for this trip, as I had done for the two previous trips with Kacper, but did not request flight following from ATC. I was familiar with the route, having “Google Earthed” it as well as having flown it twice. I thoroughly enjoyed the day, and wished I had been flying longer!
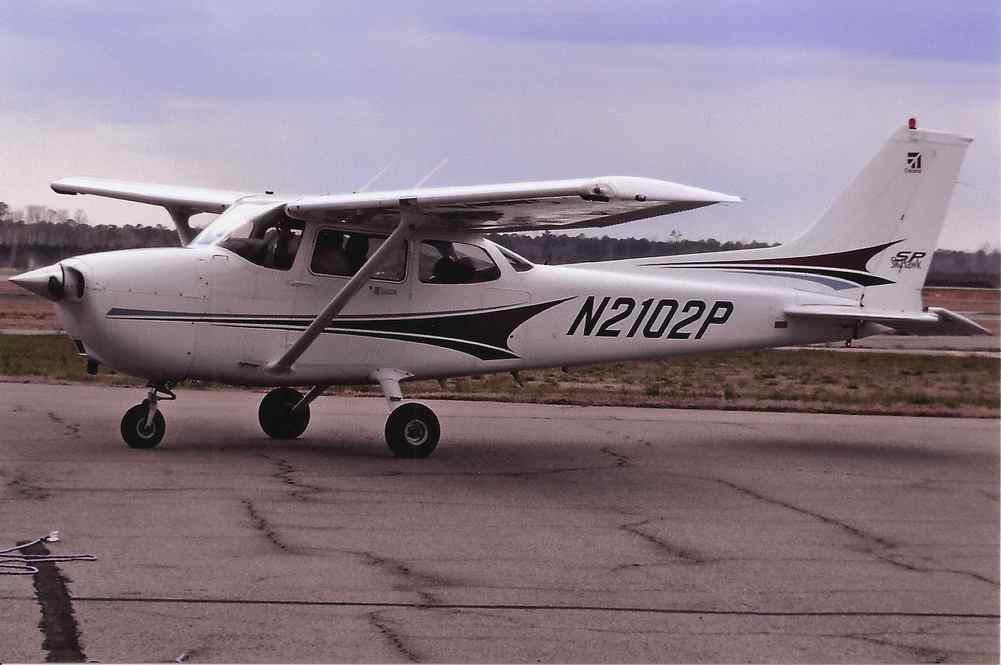
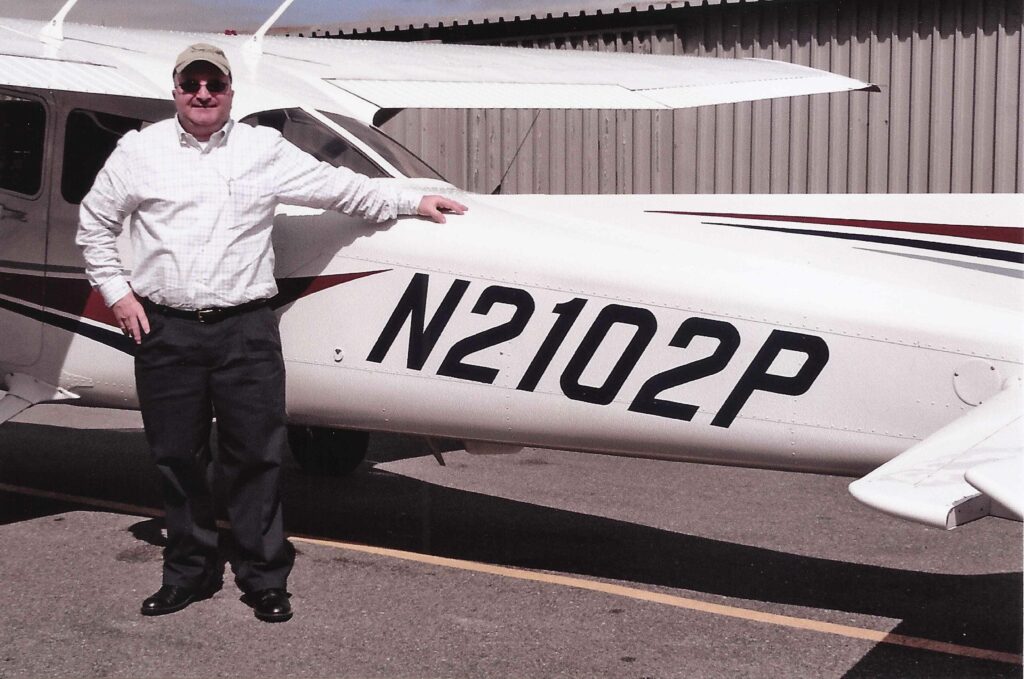
Kacper and I then did a three point cross country together, going to Emporia (EMV), Edenton, NC (EDE) and back to PVG. It was a nice day, but my normal training buddy, N2102P, was not available, so we took N64754. It was a little different, but I had a few hours in that plane too, so I got comfortable quickly. It was another very nice day, with a little more wind this time that before, maybe 10 – 12 knots at Edenton. It was fun getting to fly to three airports and to see all the countryside in between. A couple of weeks later, I made the same trip solo, once I got a good weather day.
I still needed about an hour of solo cross country time to complete the experience requirement for a private pilot trainee, so I picked Tappahannock (XSA) for a destination. That’s up in the area where I grew up, so it was fun getting to fly there myself. I had been before with Dick in his plane. The trip started out nicely, but it got slightly bumpy on the way up and I had to descend a bit below my cruise altitude to clear some clouds that formed. Other than that, it was no problem getting there and making a nice landing. I back taxied and took off again to get back to PVG without burning too many extra (expensive) flying hours. I steered a bit farther to the west on the way back to avoid the clouds again and landed with 2.0 hours on the Hobbs meter. Another very nice trip.
At this point, my training was all preparation for the check ride. I practiced several maneuvers that I had not performed since December, like S-turns and turns around a point. Also, I needed work on my short and soft field landings and takeoffs. I was making good progress; now well into the month of June. However, the weather had turned more summer-like with afternoon thunderstorms. In fact, it turned into a wetter, cooler, stormier year than I could remember for a long time. I had a few periods of over two weeks without flying due to weather and work schedule not matching up to provide me with an opportunity. June dragged into July, and Kacper went to Poland for three weeks too. I trained with Andrew while Kacper was gone, but even then I had to wait two weeks for the weather to improve.
Finally, toward the end of July after Kacper returned, I was getting close to check ride proficiency. My short and soft field landings were the last things needing improvement. More weather delays, and more training. Finally, in early August things came together. I had to show Kacper one more good day of good soft field landings. It wasn’t a great weather day, with marginal ceilings and a few scudding clouds right at pattern altitude. My landings were poor: disappointing. We ended the day with less than an hour on the Hobbs. I was determined, and came back the next day for one last try with Kacper before he departed again for three weeks of pipeline inspection flights. I had pulled things together and made several nice soft field landings and one great short field landing.
Kacper signed me off for my check ride, and we scheduled the exam with the examiner for the following Tuesday morning. He advised us to make sure all the required ground training was included in my log, and we spent some time getting that done. I signed up for one last practice flight with another instructor, Chad, before my check ride. It went well, and I was set.
The examiner called me on Sunday afternoon to ask if I could do my check ride on Monday instead of Tuesday. I gulped and said, yes, I could do that. He gave me a cross country assignment to plan for a trip to Front Royal (FRR). I spent the next 4 hours getting everything planned, calculated and shined and ready to demonstrate to him the next day. Route drawn on chart, weight and balance calculated, fuel requirements calculated and adjusted for temperature, takeoff and landing roll calculated, extra airport information tabulated in case I have to divert while enroute, etc., etc.
I met the examiner Monday morning at 1130. He spent about 15 minutes looking over my logbook and the aircraft logs to make sure I was qualified to take the exam and that the airplane was safe to fly. Then we logged into the FAA system and finalized my application to start the exam. We spent about an hour and a half doing an oral exam, which he punctuated with some interesting stories and commentary as well as a few bits of wisdom and advice. It was rigorous, but pleasant and helped put me at ease.
By 1330, we were on our way to the flight school to check out and preflight the airplane. I completed the preflight and we discussed the plan for once we were airborne and then got in and started up the airplane. I taxied over to Runway 10 and demonstrated a soft field takeoff and then climbed out and began the mock cross country portion of the check ride. He halted me about 10 miles into the trip and had me put on the hood for simulated instrument work, and once that was completed, demonstrated steep turns, slow flight, stalls and some situational awareness. At this point, the examiner took control of the airplane and demonstrated some interesting slow flight, stall and spin characteristics and corrective actions. It was a nice diversion and I learned a good deal.
By then, we were about halfway done with the flight. Once he turned the plane back over to me, he had me cut the throttle to idle and execute a simulated engine out landing which went well, with him offering encouragement the whole way down. He particularly seemed to like how I performed a nice forward slip to reduce altitude to make a good approach on my selected emergency field. He then had me recover and level off at 1000 feet to demonstrate turns around a point. About two turns around the barn I selected and he had me climb back to 2300 feet.
He then had me, without looking out the windows, use equipment in the airplane to find my current position on the chart. I was allowed to use the GPS, but not the map display portion, so I plugged in PVG and got the bearing and distance and quickly located us on the chart. Then he had me dial in the Norfolk VOR and steer to it. Completing that, he had me use the CDI fed by GPS to steer toward PVG. We followed that until a few miles out of the field, and then called in on UNICOM to get advisory info to identify the runway in use, as the winds were light and variable from the north.
Runway 2 was identified, so I maneuvered to enter downwind at a 45 degree angle, and executed a normal landing. I then taxied back and he had me demonstrate a short field takeoff, followed by a short field landing. After taxiing back, I made a normal takeoff and the examiner cut my power while we were at about 500 feet on climbout, simulating an engine loss on takeoff. He emphasized the need to execute the checklist, and then had me recover and continue in the pattern. He asked me to throttle back to about 1800 RPM on the downwind leg, which was actually my normal power setting, so no problem there. Then he told me to reduce power to idle when abreast the touchdown point and execute a soft field landing, no power. As I began, he said something my instructor said several times while we practiced engine out landing away from the airport, “You better make it!” He also said not to worry about the displaced threshold; he would accept a landing anywhere on the runway.
Honestly, while it was critical that I get that landing right, I was already very comfortable in the cockpit with the examiner, and was “all warmed up” after a couple of landings. I began my turn to base early and did not deploy flaps yet, wanting to make sure I could reach the field. I knew I would be quite high on final, but decided it would be less risky to be high than low, and I could always slip down to glideslope, which seemed to be something the examiner enjoyed doing and seeing. So I did. Once assured of reaching the field, I applied 10 degrees of flaps and once stead on final I put down full 30 degrees of flaps. I was quite high, so I went into a nice, steady forward slip until I was down far enough to land at the threshold. He suggested I might dump a little more altitude, but I didn’t do it. We leveled off just before the threshold and touched down pretty much on the numbers with the nose high and I held the nose wheel off the ground until full elevator no longer would hold it and gently set it down. He was very complimentary, and I have to say it was probably the best soft field landing I had ever made.
He had me taxi back to the hangar, and once shut down, he congratulated me and told me to finish taking care of the plane and he would meet me back at the terminal. With my head swimming, I went into the school and checked the plane back in and paid for it, gratefully accepting the congratulations of all. I went back to the terminal and the examiner printed out my temporary certificate and congratulated me again. I thanked him, and told him I learned a great deal on the ride and appreciated his flying tips and advice. He seemed genuinely pleased to hear that, and we shook hands as I left, head still swimming in disbelief, relief and excitement. It was 1535.
I still can’t quite believe it is over and I have a private pilot’s license to fly single engine, land airplanes. I will definitely miss flying with my instructor. Kacper is a great pilot and a wonderful, patient and capable instructor. I thoroughly enjoyed flying with him, and hope I can afford to have him check me out in a couple of the other airplanes the school has available for rental, particularly the Warrior.
I’m not sure yet when or where I will fly for my first flight as a licensed pilot. I expect it will be some time in the next couple of weeks, as I do not want my skills to atrophy, but I have not yet selected a destination of purpose. Whatever it will be, I know I will enjoy it completely!
Flying Lessons and First Solo Flight
Back in March of 2012, I was invited by Dick, one of my friends and neighbors, to go flying. He suggested we might fly to Tappahannock and then from there to my mother’s house so I could take some pictures. It was a beautiful day, a little cool at the start, but clear, calm skies. We took off and flew over the Dead Fleet in the James River, toward Williamsburg and then on to West Point before descending and landing at Tappahannock to stretch our legs and see what the new airport there looked like. Then we took off again and flew northerly over the Rappahannock River to the Northern Neck before bearing a little east toward the Potomac side. We crossed just north of Montross, emerging
over the Potomac at Currioman and the little sandbar island known as Hollis Marsh.
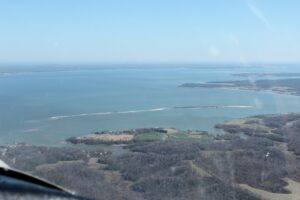
The sand island known as Hollis Marsh, where I used to help Franklin Foxwell fish his peeler traps 30 years ago.
We could see the cross on St. Clement’s Island easily. We then headed southeast down river toward the Yeocomico, and then back in to the southwest just upriver from the mouth of the Yeocomico toward Mom’s place. We circled the house a few times while I snapped photos, and then headed more or less straight back to Hampton Roads. We crossed
over Farnham, then back across the Rappahannock and over the race track on Rt.17 north of Saluda. We kept our course to the east of the airport at West Point to avoid sky divers there and then back toward Williamsburg, over the Dead Fleet and back on the ground at Hampton Roads Executive Airport. We might have been gone 2 hours, total.
I had a great time, and took lots of photos along the way. I have been keenly interested in aviation since I was a young boy, attending airshows every chance I got, and reading about aviation history and aviation in general all my life. Over the next 9 months or so, I went
flying with Dick several more times, and even got some “stick time” as we flew from place to place. Unknown to me, he and my wife spoke about my flying, and around Thanksgiving, my dear wife suggested I might start take flying lessons as a birthday, Christmas, anniversary gift “for the rest of my life.” I don’t know why it had not occurred to me on my own, but somehow I had always considered it out of my reach. I decided not
to give her a chance to back down, so I accepted, and right after Thanksgiving began my lessons.
I researched the local schools and talked to several friends and neighbors before settling on the Curtis Eads school at Hampton Roads Executive. I stopped in one day (the 26th of November) on my way home from work to inquire, and was presented with the opportunity to take a “Discovery Flight” right then.
I was paired with a very friendly CFI named Kacper (Polish, pronounced “Kasper”) who gave me a checklist and pointed me to a Cessna 172 on the ramp. He assisted me in making a preflight inspection and then he motioned me into the left seat as he got into the right and walked me through the checklist as we started the airplane and taxied to the
run-up area. He patiently got me through all the preflight checks and discussed the takeoff procedure and then we taxied to the hold-short line for Runway 2 – one last chance to back out – nothing doing. He announced our intention to take off on the radio and we taxied onto the runway, got on the centerline, powered up and took off. I don’t remember the details of what we did, but we flew around the area a little bit as he talked me through each maneuver and the checklists, and then we were headed back into the pattern for landing. He talked me through the process as I followed along as best I could, and we somehow
ended up on final approach with about the right picture out front, and we (or he) landed right back on Runway 2 and taxied back to the school. It was the fastest 30 minutes of my life. Of course, I was hooked. I signed up for my next flight right then, and off I went on my quest for the private pilot’s certificate.
Training began in earnest. My next lesson was 1.2 hours and we began learning basic maneuvers – climbs, descents, turns, straight and level flight and three touch and go landings at Suffolk. The next time we practiced maneuvers from lesson 1 and added more on power, pitch and trim and some “foggle” time to begin some basic simulated instrument training. Each lesson from there added more maneuvers to my repertoire
and more practice to gain proficiency. After four lessons of maneuvers and practice, we began dedicated landing practice. I had no idea it would be so difficult for me to master landings.
I spent the next 4 lessons doing nothing but pattern work and touch and go landings. 46 landings in the course of 5.1 hours of instruction. Then Kacper was out of the area for a few days, so he lined me up with Daniel, another instructor, for a lesson. The pattern work was interrupted for this lesson as Daniel took me out to the training area and we practiced maneuvers, stalls and navigation/situational awareness. Then back to the landing training the next 4 weeks with Kacper. Then the next week, finally, I was starting to get the hang of it. I had bought some other study materials to help get past my landing plateau,
and I finally realized I was doing everything required for a “good” landing – just not all together on the same approach. I studied hard, sat in a chair with my eyes shut and walked myself through the pattern from takeoff to crosswind, downwind, base, final and then landing. I memorized and learned everything about it – target airspeeds, engine
RPMs, flap settings, altitudes and procedures. I drilled myself so I would not let it fall apart in practice. For several days, I talked to myself in the car on my long work commute. That week I got into the cockpit with Kacper and confidently worked my way through the checklist, took off and ran a nice pattern and approach and got a decent landing.
Then another and another. I was hitting my target airspeeds, altitudes and timeline. I did not feel rushed and I knew what I was doing and what I was doing next, and when I was going to do it. I wasn’t perfect, but I was getting the hang of it and I was feeling much more in control. After the second week of good landings, including a pretty gusty day’s worth, Kacper booked me with another instructor, Andrew this time. We went over a few pre-solo knowledge items before heading out to the plane, and then we headed out of the pattern to demonstrate some maneuvers. All went pretty well, including a good engine-out simulated landing. We returned to the pattern. This time, the “main” runway at Hampton Roads was out of service, and we used Runway 2, which is a shorter runway with a 900′ threshold setback. My meticulous pattern work was disrupted by the shorter downwind leg, and a few other distractions and the different instructor. My first attempt to land
turned into a go-around. My next 4 attempts were landings, but the first 2 were not good. The last 2 were OK, but not great. Although I got some good words on my airwork outside the pattern, I knew I wasn’t getting the nod from Andrew for a solo the next week, and I knew he was right.
The next week came, and I arrived early. Kacper wasn’t there yet, so I got my weather brief and made notes on a few items there. I looked over my pre-solo quiz and made sure I had it completed. Kacper arrived and asked about the weather brief. Then we went over my pre-solo quiz which he had given to me two weeks previous to complete. We discussed a few items and made a couple of additions where I needed a little more
detail and then went out and gassed up and preflighted the airplane. We took off and began the old landing routine. I was back in the groove, and using the “good” runway – Runway 28 – so was making pretty good landings again. I was asking myself where that was the week before with Andrew, but soldiered on, hoping to get the news that I would be coming back to solo the next week. Finally, Kacper told me to go full-stop on the next landing. Once on the ground, he asked me if I had my logbook and medical cert with me. I replied affirmatively. As we exited the runway, he directed me to a spot on the ramp and had me shut down. I knew I was going to solo!
After shutting down, we got out of the plane and I handed him my logbook and medical certificate so he could endorse them for me. He signed them off, and described the process. Follow the checklist. Three takeoffs, three full-stop landings. Bring the plane back. I was a little anxious, but as I glanced at my log with the new endorsement in it, I
realized I had about 140 landings in it. And I had just done 10 more in the last hour. I watched Kacper walk away toward the terminal as I got back in the airplane and strapped into my seat. As I began my checklist for starting, I began to feel the exhilaration. The anxiousness vanished as I started the engine and checked operating parameters and
continued the checklist to get ready to taxi. This is what I was doing this for! To take off and fly an airplane by myself!
I taxied to the run-up area and did my run-up checks. So far, so good. Completed my run-up checklist and my pre-takeoff checklist. I taxied to the hold-short line for 28 and waited as a Warrior made a touch and go. I announced my departure, and after making one more check of the pattern to make sure there was no one else on base or final, I taxied onto the runway, lined up and applied full power.
Good oil. Good vacuum. Good amps. Right rudder, a little crosswind…right aileron. Airspeed alive. Right rudder – stay on the centerline, a little less aileron. 55 knots, rotate. More right rudder. Begins lifting off…a little less aileron, wings level. Climb
at 74, right rudder – straight out the end of the runway. Wow, tons of runway left. Right seat’s empty; well, I have to land it – the alternatives are not acceptable. 600 feet, “Hampton Roads Traffic, Skyhawk 02P turning crosswind, Runway 28, Hampton Roads.” Begin nice easy turn to left. Keep climbing – 74 knots. Level off at 1000 feet,
pull power back to 1800. Look around…any traffic? Announce turn to downwind. Maintain 1000 feet. Landing checklist. Seatbelt on, fuel selector to “both,” mixture full rich. Maintain 1000 feet – look for other traffic again. Look for aim point on 28. OK, next to the numbers now. Power back to 1500, 10 degrees of flaps. Slow to 75 knots and
descend at 75. Watch out for drift…correct for drift. Keep scanning. Announce and turn base. Flaps to 20 degrees, slow to 70 and descend. Watch out for drift…stay perpendicular to the runway. Wow, there it is in the left window already. “Hampton Roads Traffic, Skyhawk 02P, turning final, Runway 28, full-stop, Hampton Roads.” Flaps to 30
degrees, line up on centerline. Slow to 65 knots and descend. Keep those numbers on the bug spot on the windshield. A little high, power down some. Drifting left…get back on center…ailerons and rudder for wind correction. Lined up nice…add a little power back to stay on glide. Almost there…right on center. Airspeed looks good. Wow, here are the
numbers! Level off…hold it off…hold it off. Ease the nose up a little more….hold it off….Kacper always reminds me, gotta do it myself now….hold it….hold it…hold it! Wow…wheels just kissed it! Keep holding the nose up…..hold it…nose just comes down nice and soft. OK, brake….easy braking. Wow, plenty of room…gonna make the first turnoff!
And that was it. I got around the pattern, hit all my targets and made
a pretty good landing. Mains touched down nice and easy and the nose came down gently. I made my first solo takeoff and landing! Wow! I turned off and completed the after landing checklist and began my taxi
back the threshold. After the second landing I noticed Cathie (Dick’s lady) standing by the fuel truck taking pictures of me. Then I saw Dick in the terminal. I thought, “That’s cool! They have pictures! They must have had a deal with Kacper to let them know when I was going on my solo.” I completed my final taxi, takeoff and landing and taxied triumphantly to the school ramp. I completed my checklist and shut down. Dick and Cathie were already there to greet and congratulate me. I had on a brand new shirt, so was hoping they were not going to cut the tail off, despite it being my first solo! Kacper came around and
remarked that the airplane looked OK, so things must have gone well. There were several posed pictures and much more back slapping and congratulating, and then Kacper and I went in for the debrief. We discussed the new privileges and limitations I had as a solo student, and discussed the next steps in my training. The very next week, we would start working with some controlled airports.
As it turned out, Dick and Cathie had been at the airport for over an hour, watching as I went around the pattern with Kacper. They did not have any deal with Kacper to let them know when I was going solo – I’m not sure he was sure until that afternoon. Dick just had a notion that I would be going on my solo that day, so they watched and waited. They hid behind dumpsters, the fuel truck, other airplanes and the terminal to keep me from seeing them. Cathie stepped out one landing too soon, as they were not planning to let me know they were there until I had completed all three landings, but it all worked out in the end. That evening, they presented me with a very nice keepsake album with photos
of my solo – something I am deeply appreciative of and will treasure.
My solo on 26 March 2013 was exactly 4 months from my first training flight with Kacper on 26 November 2012. I was about a month behind my expectations, but I am very happy anyway. I am particularly pleased with my instructor, who is not only patient and friendly, but is also a great teacher. I look forward to completing my training with him and getting my private pilot’s certificate sometime this summer.
Repairing a Kenwood TH-79AD Display
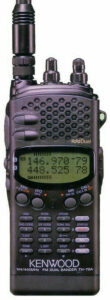
I bought a Kenwood TH-79A/D dual-band (2m/70cm) handheld (HT) ham radio from Ham Radio Outlet in San Diego back in 1995. It was a very advanced handheld for the time, compact, sturdy but not too lightweight and loaded with great features. A 5w output on 2m was pretty good, and the 3 or 4 watts on 70cm was also pretty good, and worked great in the Southern California area, as it is simply loaded with repeaters. I loved it. I took that thing with me all the time – on many hikes and even out while sailing.
This was my trusty friend for the next 5 years or so in San Diego and Newport, RI until I got orders to Japan. I packed it up carefully with most of my other ham gear while I spent the next two years stationed in Japan, or as my wife put it, as an occasional visitor to Japan between my shipboard periods underway. The little HT remained nestled in its original box in a warehouse in Rhode Island until I got back to the states in 2001. As luck would have it, I ended up in Rhode Island again, so the household goods we had in storage made a very short trip back to our new place, and I eagerly looked forward to getting active in Ham Radio again.
After unpacking all the gear and setting up my ham shack again, I discovered that the LCD on my little TH-79 was often quite dim and hard to read. A sharp tap or jostle would usually restore it to an acceptable level, but it was happening more and more often, and occasionally would vanish altogether. The same percussive maintenance would get it going again, until at last the day came when it was no longer working. The rig turned on and everything seemed to work fine, but there was nothing on the display and no amount of rapping and tapping brought it back to life.
At this point, I was pretty sure the cause was something loose inside the radio. I tried opening it and checking to see if anything was obviously loose or if there was evidence of any obviously failed components. I didn’t have the service manual or anything for instructions on how to take things apart, so was reluctant to dive in and completely disassemble it. At any rate, I took the three screws out of the back and separated the unit into front and back halves. I discovered a ribbon connector and a small 3 wire connector (power, I assumed) and a few exposed components, but not much more. I cleaned everything, hoping that was the issue. I even unseated the ribbon cable and cleaned its ends before reassembling.
Minor success! The display was working again, but was still dim and not reliable. I was able to use the radio for another couple of years before the display quit working again. By then it was time for me to transfer duty stations again, so I put the little guy away again and decided to tackle it more thoroughly later, after I had settled in my new location. I thought the issue was probably the ribbon cable.
I moved to Virginia and got settled in. My new job left me without much time for anything, or at least did not leave me much “non tired” time for things, so I left most of my ham gear packed up. I still used the Yaesu FT-5100 mobile in my truck for a while, but eventually even that got packed up when I bought a new vehicle. I was no longer an active ham – something I never thought would happen.
Fast forward a few (8!) years. I had retired from the Navy and had been comfortably established in a new job that left me with more time and energy for hobbies. Along with my engine and machine shop hobbies and my computer and electronic interests, I still had ham radio in the background. I decided to put a radio station back together, and strung a couple of antennas in the attic and hooked up my Kenwood TS-570. Ahh, the sweet sounds of a scrabbling DX pileup! I dove right back in to the hobby, and rediscovered my poor, broken little fellow, the TH-79, gently tucked away in the original box I had saved. Still not working, and now the battery was shot. No surprise, since the rig was now 17 years old, but I had the external power supply for it, so all was well. It was still a nice radio, and by all suppositions, everything worked but the LCD. I decided to try my hand at a more thorough repair.
By now, the service manual for the radio was widely available on the web for download, so I downloaded it to ease the mystery of how to really get into the radio without destroying it. I also searched and read as many accounts as I could of others having a problem with the LCD. Most discussed unsuccessful attempts to find something obviously NKR (not quite right) and to clean the ribbon cable contacts as I had done 10 years earlier. Finally, I found the key. Once the radio was really torn down to the point that the actual LCD module could be removed, the culprit was found.
The LCD, buried under the “A” unit in the front of the radio, is not connected by a hardwired
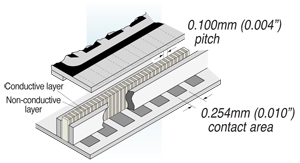
connection. Instead, the ribbon contacts on the edge of the display were connected to the “A” board by a “zebra strip
” (elastomeric conductor) – a tiny conductive strip made up of rubber with tiny laminated conductive layers sandwiched together across its length. Kind of like a really tall club sandwich on its side, with the bread slices and the meat (conductor) and cheese (dielectric) layers on edge. The edges of the conductive layers contact the PC board and transmit the signal across to the other edge of the zebra strip to the conductors in the display ribbon. That way, no hard wiring is required, and some misalignment can be tolerated. The only trick is, the PCB and LCD conductors must be clean, and the edges of the zebra strip need to be clean. And the strip needs to be compressed between the display and the PCB to maintain good, solid contact.
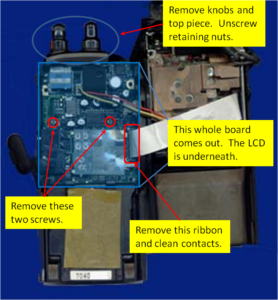
I read a few accounts discussing this issue – that the zebra strip had accumulated some goo and maybe corrosion over time and needed to be cleaned and re-seated between the board and the LCD, or that it had degraded over time and had shrunken to the point that good contact was no longer possible. The trick was getting to it. First, the “A” unit had to removed from the radio. Follow the instructions in the service manual. Then the LCD had to be removed. Also, follow the service manual. Here, you have to desolder the two side contacts of the display (probably power) from the bottom of the PCB. I recommend a solder sucker, but that may be because I have never been good with desoldering braid. The tabs were pretty easy to unsolder so that they were free. Then, carefully remove the LCD from the board by gently unsnapping the plastic corner clips, being careful not to lose the zebra strip from underneath or the two rubber connectors for the speaker. Turn the display over and look for the zebra strip if it is not still stuck to the PCB.
At this point, you are ready to clean things. I used denatured alcohol, but most recommendations are for simple isopropyl alcohol and clean, lint-free swabs. Clean the PCB pads, the LCD ribbon connectors and both sides of the zebra strip. Let them dry thoroughly, and do not handle them with bare fingers. I recommend using some clean tweezers. After things are dry, carefully replace the zebra strip in the channel in the LCD back so that it is in contact with the ribbon on the back of the display. Then, carefully put it back on the board, being very careful not to let the zebra slip or fall out of that position. If it gets out of place, you will have to remove the LCD again to re-align it for proper contact.
Once the LCD is snapped back in place, re-solder the two tabs on the front and carefully clean the LCD face so that no dirt or fingerprints remain before you put it back into the case. At this point, you are just reversing your actions from taking the unit apart. Put the “A” unit back into the front shell of the case and screw it in good and tight to make sure the zebra strip is firmly squeezed. Screw the nuts back onto the volume and channel selectors at the top, put the rubber boot back on, and replace the top piece. Reconnect the ribbon and power connectors, and put the two halves of the unit back together. Screw together.
Now power up. The display should be functioning again, assuming you have the zebra strip properly positioned and all the connectors replaced properly. It *is* possible to put the ribbon cable back in the wrong way up. I found that out for you.
I hope this helps somebody else. I’m sorry I did not take any photos while I had the radio open!
November Nor’easter
Wow – plenty of rain the last few days. In fact, it started raining Tuesday evening, and did not really stop until some time yesterday, and then it started again. It was mostly a drizzly rain yesterday and last night, so did not add up to the 7 inches or so we got of the previous two days, but it was still messy. It is overcast today with occasional misty drizzle.
I did not have to go to work on Wednesday since it was Veteran’s Day, and I did not go to work Thursday due to the weather and flooding. In fact, they closed work Thursday after they saw how bad things were, and then they ended up doing the same thing Friday. I went in Friday for a few hours to finish up some things before the weekend.
Since I was not at work, and the weather was not good for going anywhere, I fiddled around in the garage a bit. Mostly I spent the time just cleaning up my shop area. I managed to get my work benches pretty well cleaned off and then did some troubleshooting on my bandsaw. the speed control was not controlling anything and let the saw run full speed all the time. After taking the controller apart, I found a bad triac on the circuit board that needed replacing. Luckily I had one in my junk box, so after a little soldering I had the saw running like new.
I had a broken oiler for one of my engines than needed overhaul. I started on that too, but have not finished yet. It came on the latest engine I bought. It is a nice cylinder oiler with a good ball check and vent tube. The lower glass is broken and of course, all the gaskets are old and brittle. I’ll cut new gaskets out of cork and seal it up nice and tight. Then I’ll order a new glass for the bottom part. I took the whole thing apart to clean and fix, but that was all that was broken.
What were those old engines for?
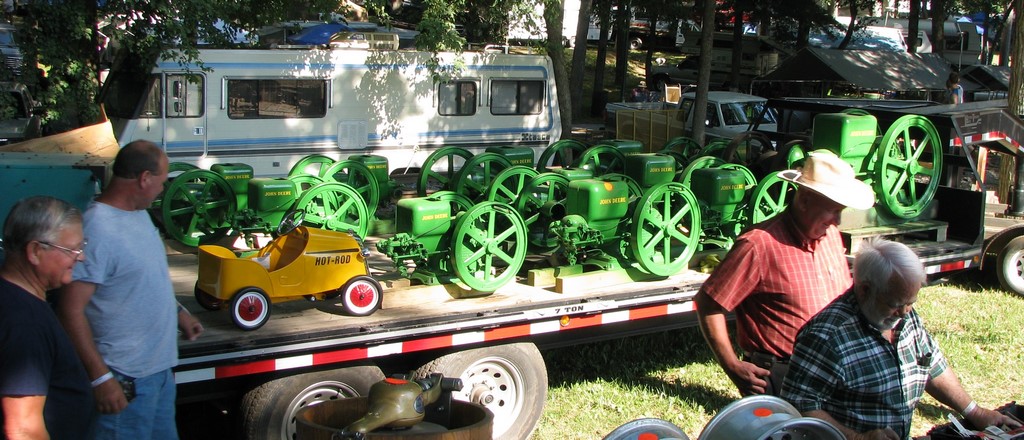
Trailer load of John Deere hit and miss engines at the July 2009 Denton, NC SouthEast Old Thresher’s Reunion.
When I go to old engine shows or when people stop by while I am tinkering with my engines in the driveway, they mostly want to know what they were for. Without passing too much judgment on what people know or don’t know, I suspect most I meet are not very familiar with many of the statistics and facts regarding conditions in America in the early 20th century. Life now – even life back in the 1950s – bears little resemblance to those times. If you think about it, life in 1900 had far more in common with life in 1800 than it does to life in 2000. Horses were still the primary means of personal transportation, and were still common even in commercial transportation.
My oldest engines were built in 1918 and are real bits of history. It is hard now for most people to imagine that during that time, WWI was being fought with American GIs already on the Western Front. Woodrow Wilson was President, and the Panama Canal had only been open for about 4 years. The population in the United States was just 103 million in 1918, that also being the only year in the 20th Century that our population decreased. The entire federal budget was 12.68 billion and a first class postage stamp cost 3 cents.
Electricity would not be common in rural areas for better than 20 years and mechanical refrigeration was an industrial process, not a household necessity. We think nothing of it today. Water just comes out the faucet. Tractors till the land and refrigeration is not simply a luxury in any home, it is a standard amenity in all homes, taken mostly for granted until a hurricane comes along and you have no power for a week. Then you have to eat everything before it goes bad. That’s when you start to recognize that your life would be very difficult without electricity.
I’m not sure what most of these 1-1/2 horsepower engines cost back then but it was probably somewhere around $30. Keep in mind that the average annual income in 1918 was around $1,500. Sears and Roebuck sold their 1-1/2 horsepower Economy engines for $29.95 in 1918, so it is probably fair to assume most competitors were similarly priced. I don’t know how much it cost to maintain a horse for a year, but it was probably hard to use a horse to do all the things these engines could do. I also suspect gasoline at 8 cents per gallon was cheaper than maintaining horses, and you don’t have to feed engines when they’re not working.
Why was the relatively new internal combustion engine the power source of choice when steam power had been around for over 100 years and was quite solid and reliable? Two reasons: economy and convenience. Steam engines were more expensive, and a steam engine of comparable horsepower needed a boiler, was bigger and was a lot more difficult to move from location to location. Also, before a steam engine could be used for work, steam had to be raised to operating pressure, the engine had to be warmed up and made ready for work. Small gas engines were much lighter, could easily be moved from location to location to be belted up to different machinery, and could be started quickly and placed in service without fuss. They also consumed considerably less fuel. The most efficient steam engines of the time operated with less then 30% thermal efficiency, where internal combustion engines could easily approach 50% and greater for diesel engines. In short, a 1-1/2 horsepower hit and miss engine could run literally all day on a gallon and a half of gas.
So what did they use the engines for? Well, there were many tasks that required power. Here is a summary of a few off the top of my head:
- Pumping (water, oil, sewage, etc.)
- Sawing wood
- Chopping straw
- Bailing hay
- Threshing grain
- Grinding feed
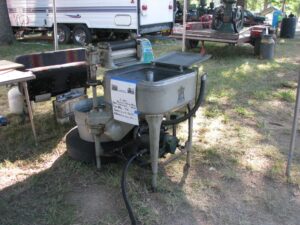
- Washing clothes (Maytag with a kick star!)
- Shelling corn
- Grinding flour and meal
- Churning butter
- Milking cows (Yes! Vacuum milking machines!)
- Making electricity (Lots of old Delco and Fairbanks generators out there)
- Mixing concrete
- Hoisting winches
- Shop power (blacksmith, machine shop, etc.)
- Making shingles
There are others, I’m sure, but you get the idea. I hope that helps explain just what these engines were used for. Me? I use mine to make ice cream!
Overhauling a 1-1/2HP 1918 McCormick-Deering Model M
I’ll be adding a few posts and photos as I describe the work done in cleaning up and starting up a 1918 McCormick-Deering (International) 1-1/2 horsepower Model M engine once I figure things out here. I have already done a good bit of the work, so this is all a catch-up game now.
1918 1-1/2 horsepower Model M understrike engine.

