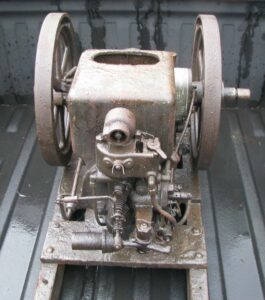
1918 1-1/2HP IHC (McCormick-Deering) Model M in the truck and ready to come home.
It has been several years since I bought the 1918 McCormick-Deering Model M. It was a nice barn find understrike engine I bought from John Rozevink and picked up at Coolspring in the fall of 2009. The engine was on the original skid with plenty of original paint, under a rather thick patina of no-so-original oil, chaff and dust. It took a good bit of elbow grease and wire brushing to get all that schmoo off the engine, but it came clean and looks great. The magneto was still attached and once cleaned up and lubricated proved to be hot and quite serviceable. I cleaned up every part of the engine and reassembled it. The two-needle mixer needed some work, and like the rest of the engine needed to be cleaned out. The needles were broken off in the body, but the previous owner had slotted the ends so they could be adjusted. I guess this engine worked hard somewhere many years ago. I made new needle valves from some brass machine bolts and press fitted some knurled thumbwheels I I made onto them.
Then it was time to see if the engine would run. Everything seemed in order, except the fuel system was still not installed due to needing more work. I needed to replace the rusted out fuel tank and plumbing and had to rebuild the fuel pump. So I just plugged the ports on the mixer and hand filled the bowl with some gas for testing. I figured it would run for about 10 minutes like that. So, after pulling the flywheels over until my shoulders ached, I realized it would not start on the magneto (low tension – I should have known better, but wanted to try anyway). I attached a battery and coil and got it to fire right up, and then hooked the mag back up and it ran fine like that. Now satisfied that my engine would run, I attached some temporary pneumatic wheels under the skid so I could move it around more easily, and began taking it to shows. The inflated rubber tires caused it to bounce, making it seem a little anxious. Anyway, it was fun to run, but I just couldn’t bring myself to buy a new fuel tank.
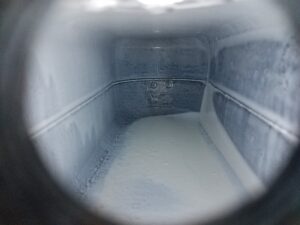
Fast forward to this fall, when I rediscovered the tank sitting on a well-hidden part of my workbench in a pile of other “round to-its.” I looked it over and saw the holes in the bottom, and figured it had a good life for something about 100 years old. But on closer inspection, I saw there was still plenty of good metal there to work with and there were not that many holes. Perhaps the tank could be salvaged and returned to use. The holes were not tiny, but the bottom was still solid, so I took a handful of nuts and bolts and dumped them inside and began shaking to clear out the loose rust. Once I dumped the mess out and blew out the remainder of the rust and dust with some compressed air, I inspected the inside with a bright LED penlight. Most of the tank was clean, bare metal. Only the bottom showed rust, and nothing scaly and flaking off. The holes were a little bigger, but nothing some good tank sealer wouldn’t cover.
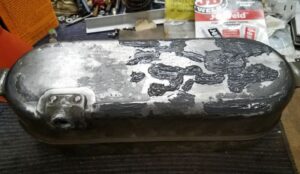 I got a can of tank sealer from a vendor at Coolspring this October and used three coats of that on the inside with some painters tape over the holes to seal things up. I let it cure for a couple of days an looked things over again and realized the holes were just a tad too big just to go with the tank sealer on the inside. I removed the tape and sanded the areas around the holes down to bare metal and cleaned everything up with acetone to degrease, and then spackled up the holes from the outside with some JB Weld. Once everything had finished curing, I tested it with some camp fuel, my engine fuel of choice. No leaks! Now to repair the rest of the fuel system and get this engine back to running normally!
The fuel pump was in great shape. It had some junk inside, like rust, dust and bug nests but otherwise was unbroken and not overly worn. I cleaned it up, carefully making sure to retrieve the check ball as I took the fittings apart and removed the plunger. After cleaning up with some PB Blaster and replacing the leather packing washer with some new graphite packing string, it was ready for normal operation again. The discharge check valve was also in good condition and just needed a little bit of cleaning to be ready for operation.
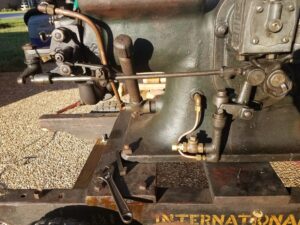
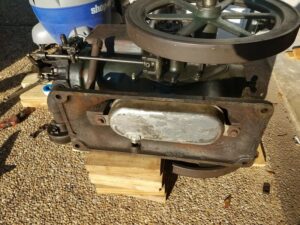 To reinstall the fuel tank, I carefully rolled the engine over on its side after removing the magneto side flywheel to gain access to the fuel pump area. Once on its side, I was able to remove the skid so I could get the fuel tank back under the base. The original bolts were used and everything went back together nicely. Then it was time for the rest of the plumbing. I was able to use all but a couple of the original fittings for the fuel lines after cleaning them up. Some of the mating parts of the fittings had been lost when the original pump discharge line was removed and discarded when I first disassembled the engine, so those were replaced with new. Otherwise, original parts were restored to operation. I replaced the suction line to the tank and the discharge line up to the mixer with new copper tubing. Then everything was cinched up tight, and ready for the big test!
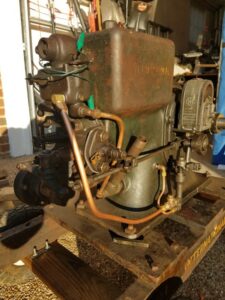 I put about a quart of camp fuel in the tank and checked for leaks. Everything looked nice and tight. I used a scrap of wood to pump the plunger on the fuel pump, and it self primed easily, and then pumped up the mixer for starting. Again, no leaks were seen and the pump packing held tight. After hooking up the starting battery and coil, I gave the flywheels a spin and she fired right up. I let the engine run for about 10 minutes and discovered no leaks on any of the fuel plumbing and the pump worked flawlessly. This engine is now ready for the next show season!

